How to make a QR code menu (free, 2026)
Reprinting menus for one price change gets old fast. Build a QR code menu free in about ten minutes, and see where a static code stops and QR ordering begins.

The five classic layouts, one-directional flow, and where to lock expensive fixed points

Short answer: design the flow before you design the room. A good commercial kitchen moves food one direction, receiving to storage to prep to cooking to the pass to service, with dishwash pulled out of that line on its own clean and dirty path. Lock the expensive fixed points first, extraction, gas, grease traps, floor drains and the cool-room, because moving them later is costly consent-triggering work. Choose a layout that matches your menu and room, add only the stations your menu earns, and prove it by walking your five best sellers through the plan on paper.
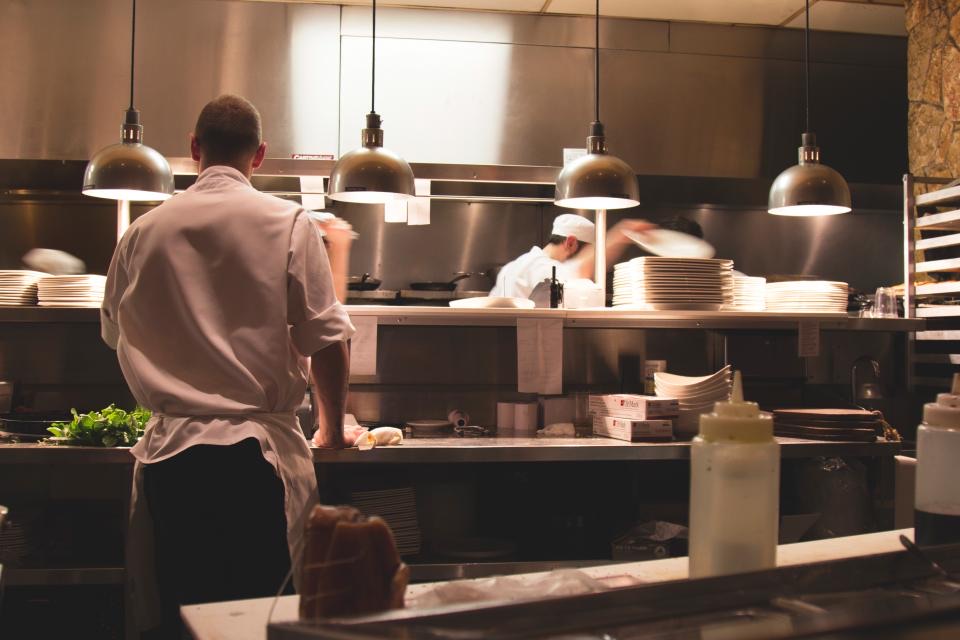
The single principle that makes a kitchen work is one-directional flow. Food travels a single path, receiving to storage to prep to cooking to the pass to service, and never doubles back. When raw ingredients move the same direction as finished plates and never cross them, you get fewer collisions, less contamination risk and fewer wasted steps. A cook, a runner and a delivery should all move the same way, never head-on.
Dishwash is the exception that proves the rule. It sits out of the main flow with its own separate clean and dirty routes, so dirty crockery never travels back across the line where food is being plated. Draw the arrows before you draw the walls. If the paper plan has food doubling back, the real kitchen will too, and fixing it later is far dearer than the groundwork in how to open a restaurant.
There is no single correct layout, only the one that fits your menu, team size and room shape. Most kitchens are a version of one of these five. Pick the shape that matches how your food actually gets made.
| Layout | How it works | Best for |
|---|---|---|
| Assembly line | Stations in a straight sequence, each cook adds one step | High-volume, repeatable menus (burgers, bowls, pizza) |
| Island | Cooking block in the centre, prep and storage around the walls | Bigger brigades and supervision-friendly sightlines |
| Zone or station | Discrete areas by task: grill, saute, cold, pastry | Varied menus with many techniques |
| Galley | Two parallel runs with a narrow aisle between | Tight spaces and food trucks |
| Open kitchen | Cooking on show to the dining room | Theatre and accountability, with noise and grease trade-offs |
An open kitchen buys theatre and a natural accountability that keeps standards up, but you pay in noise, grease drifting into the dining room and the need for every surface to look immaculate all service. A galley buys efficiency but punishes a long menu. Match the shape to what you actually run.
A common rule of thumb dedicates roughly a third of your total floor area to the kitchen and back of house, leaving the rest for dining. Treat that as a starting point, not a law, because it is entirely menu-dependent: a venue plating scratch-cooked fish needs more prep depth and cold storage than a two-oven pizza shop. Work out the equipment your menu earns first, then size the room around it.
Station logic comes from the menu, never from an equipment catalogue. List only the stations your dishes genuinely require: if nothing is fried, you do not need a fryer station or the extraction it drags along. Every station you add is more rent for its floor and more labour to staff it during service. A tight, honest station list is one of the cleanest ways to protect your margins.
Small rooms reward discipline. If the footprint is fixed, adapt the menu to the space rather than forcing a full brigade kitchen into a galley. These moves let a compact kitchen punch above its size.
Some parts of a kitchen are cheap to move and some are ruinous. Place the expensive, permanent ones first, because relocating them later blows a fit-out budget and can trigger fresh building or fit-out consent. The fixed points to lock first are: extraction and ventilation canopies, gas connections, grease traps, floor drains and the cool-room, all ducted, plumbed or hard-wired into the building.
Design the room around where the canopy and drains have to sit, then slot stations under and beside them. Benches and prep tables can shuffle for the cost of an afternoon; a canopy or a drain cannot. Because these tie into your building consent and fit-out terms, settle them before you sign anything, a point for early restaurant lease negotiation and when you spec commercial kitchen equipment.
A verifier reads a kitchen as a set of relationships, so build those in. Put handwash basins where staff actually work, so nobody leaves a station to wash their hands. Separate allergen prep with dedicated boards, colour-coding or a distinct bench, so cross-contact is designed out rather than policed. Keep chemical storage away from food surfaces, and keep raw and ready-to-eat prep off the same bench, in line with your Food Control Plan and the discipline in food safety temperatures and restaurant allergen management.
Before a single wall goes up, run the walk-the-ticket test. Take your five best sellers, mentally cook each one through the drawn plan, and count every step and crossing a cook makes from order to pass. If a burger sends a cook past the dishpit twice, or across the cold station to reach the fryer, the layout is fighting the menu. Redraw until each dish is a short, clean run: the cheapest design review you will do.
What is the correct flow order for a commercial kitchen?
The classic one-directional path is receiving, then dry and cold storage, then prep, then cooking, then the pass, then service, with dishwash kept out of the main line on its own clean and dirty route. Raw food travels one way and never doubles back across finished plates. The goal is that a cook, a runner and a delivery all move in the same direction without crossing, which cuts collisions, contamination risk and wasted steps on a busy night.
How much floor space should the kitchen take?
A common rule of thumb dedicates roughly a third of your total floor area to the kitchen and back of house, with the rest for dining, but this is menu-dependent, not a law. A pizza shop with two ovens needs less back-of-house depth than a scratch bistro breaking down whole fish. Start from the equipment your menu actually earns, then size the room around it. If the space is fixed, cut the menu to fit rather than cramming a full brigade kitchen into a galley.
Which kitchen layout is best for a small space?
A galley layout, two parallel runs with a narrow aisle between, is the workhorse for tight rooms and food trucks because every station is one pivot away. Pair it with a shorter menu, shared components across dishes, vertical storage and equipment that stacks or multi-tasks. Cross-train staff so one person can cover two stations when it is quiet. The mistake is fitting a big-kitchen station list into a small room, which leaves cooks fighting for the same metre of bench all service.
What should I position first when planning the layout?
Lock the expensive fixed points first: extraction and ventilation canopies, gas connections, grease traps, floor drains and the cool-room. These are plumbed, ducted or hard-wired into the building, and moving them later is the costly work that can trigger fresh building or fit-out consent. Everything else, benches, shelving, prep tables, can shuffle cheaply. Design the room around where the canopy and drains have to go, then slot stations under and beside them. Getting this order wrong is the most common expensive redo in a fit-out.
How do I keep a kitchen layout health-compliant?
Build the geometry a verifier expects: handwash basins placed where staff work, so nobody has to leave a station to wash hands, separate prep areas or dedicated boards and colour-coding for allergens, and chemical storage well away from any food or food-contact surface. Keep raw and ready-to-eat prep from sharing the same bench. In New Zealand your Food Control Plan and council verification will check these directly, so bake them into the plan rather than retrofitting after the room is built and the consent is already signed off.
What is the walk-the-ticket test?
It is a paper dry run: take your five best sellers, mentally cook each one through the drawn plan, and count every step and every crossing a cook makes from ordering to the pass. If a burger needs the cook to walk past the dishpit twice or cross the salad station to reach the fryer, the layout is fighting your menu. Do this before a single wall goes up. It costs nothing, exposes the bottleneck stations, and is the cheapest design review you will ever run.
Storefront, orders, kitchen, CRM and marketing in one place. Start free in a couple of minutes, no card needed. Pop in your email and we'll take you straight to setup.
Reprinting menus for one price change gets old fast. Build a QR code menu free in about ten minutes, and see where a static code stops and QR ordering begins.
Somewhere along the way you ended up with nine logins that do not talk. This maps the restaurant tech stack layer by layer, and what a dozen point tools really cost.
Average order value is total revenue divided by number of orders. Here is how to calculate it, why it beats chasing traffic for margin, and how to raise it.
Storefront, POS, kitchen, CRM, marketing. One login, one bill. NZ$1/month for the first 3 months.
Start free trial