How to Price Catering Jobs (With Examples) (2026)
Quoting a catering job on gut feel is how you end up working a Saturday for nothing. Pricing catering, line by line, with two costed examples.

Danger zone, cooking cores, hot holding, cooling and the 2-hour 4-hour rule explained

Short answer: the danger zone is 5–60°C, and per MPI guidance the whole job is keeping food out of it. Cold storage lives at 5°C or below, hot holding above 60°C, and freezers at −18°C. Cook poultry to a 75°C core (or 70°C held 3 minutes, or 65°C held 15 minutes). Reheat to a steaming 75°C core. Cool cooked food from 60°C to 5°C within 6 hours. And when food does sit in the zone with no temperature control, the 2-hour and 4-hour rule tells you whether to chill it, use it, or bin it. Two tables below cover the lot.
Bacteria multiply fastest between 5°C and 60°C. That single band, per MPI guidance, is the reason almost every rule in this post exists. You are not trying to sterilise food, you are trying to limit how long it lingers where bugs breed. Cold food sits below the zone, hot food sits above it, and the dangerous moments are the transitions: cooling a cooked batch, holding a bain-marie that dips, or leaving prep on the bench during a rush. Every temperature target here is really a way of saying spend as little time as possible between 5 and 60.
Once your team internalises that one idea, the chart stops being a list of arbitrary numbers and starts being obvious. A pie warmer at 58°C is not a minor slip, it has parked food in the worst possible place. A hot pot cooling on the bench is not resting, it is incubating. This is why the reference chart belongs on the wall where prep happens, not filed in a folder, and why it pairs with a written food safety checklist that turns these targets into daily habits.
This is the core chart. Print it, laminate it, and put it where cooking, holding and storage happen. All figures follow MPI guidance for New Zealand kitchens; overseas the bands are near-identical, but check your local regulator.
| Purpose | Target temperature | The reasoning |
|---|---|---|
| Cold storage (fridge) | 5°C or below, aim 2–4°C | Below the danger zone; slows bacterial growth. Dial is often wrong, so probe it. |
| Frozen storage | −18°C | Halts growth. Product should be rock hard, never soft. |
| Cooking poultry | 75°C core, or 70°C held 3 min, or 65°C held 15 min | Kills pathogens. Time at lower temp equals the same lethality. |
| Reheating | 75°C core, steaming hot | Second pass through the zone; go hard and fast, reheat once only. |
| Hot holding (bain-marie, pie warmer) | Above 60°C | Keeps food above the zone during service. Below 60 and the clock starts. |
| Cooling cooked food | 60°C down to 5°C within 6 hours | Minimises time in the zone. Shallow trays and ice baths, never a hot pot in the fridge. |
| Chilled delivery (goods-in) | 5°C or colder | Reject anything warmer; you inherit the supplier’s temperature abuse otherwise. |
| Frozen delivery (goods-in) | Frozen hard | Soft or partly thawed means it has been in the zone in transit. |
Cooking and hot holding are easy to get right because you can see the heat. Cooling is where kitchens slip, because a warm pot looks harmless. Per MPI guidance you have 6 hours total to take cooked food from 60°C to 5°C, and the trick is speed through the top of the zone. A deep pot of curry in a cold fridge can sit above 5°C for most of a day, breeding the whole time, while the fridge fights a losing battle and warms its neighbours.
When food is in the danger zone with no temperature control, this decision table, per MPI guidance, tells you what to do. The clock counts total cumulative time in the zone across the day, not per handling, so you have to track it rather than trust memory.
| Total time in the danger zone | Decision | Why |
|---|---|---|
| Under 2 hours | Refrigerate below 5°C, or reheat above 60°C | Still safe; you can return it to controlled storage for later. |
| 2 to 4 hours | Use immediately, do not return to storage | On the edge; safe to serve now but not to keep. |
| Over 4 hours | Discard | Beyond safe limits; no reheating or chilling recovers it. |
Worked example: a tray of cooked chicken comes out for prep at 9am for 90 minutes, goes back in the fridge, then out again at lunch for another hour. That is 2 hours 30 minutes total in the zone, so it lands in the middle band: serve it at lunch, but nothing left over goes back into the fridge for tomorrow. Track that on paper or on your close-down list, because two short exposures add up to a discard decision you would otherwise miss.
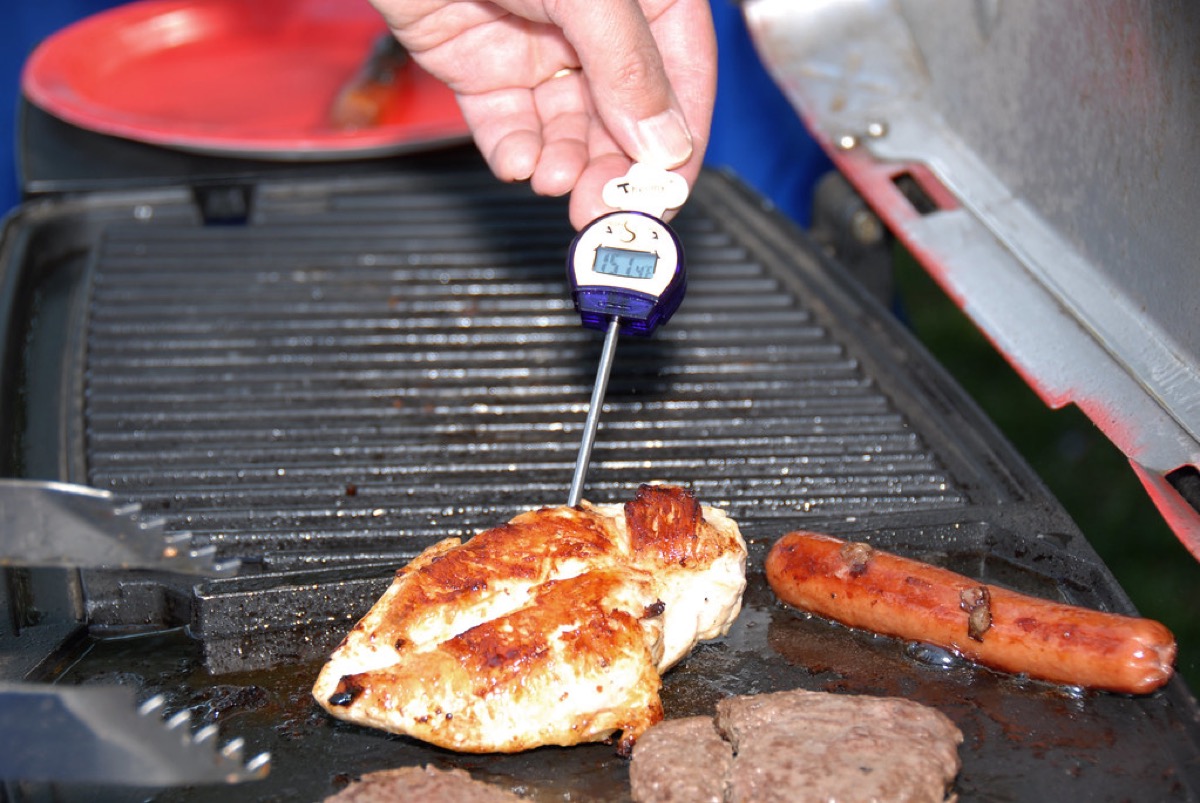
A probe thermometer is the one tool that makes every number above real. Check the thickest part of the food, hold until the reading settles, and sanitise between different items so you are not carrying raw-meat bacteria onto cooked product. Calibrate regularly with the ice-water check: crushed ice, a little water, stir, and it should read 0°C. A drifting probe quietly falsifies every record you keep, so keep a spare and test it often.
Logging is what turns good practice into provable practice. Verifiers do not just want to see clean fridges, they want records: fridge and freezer temperatures logged twice daily, cooking cores spot-checked, cooling times noted, deliveries checked at goods-in, and probe calibration dated. The log is the evidence that your system works even when they are not watching. Your opening and closing checklists are the natural home for these checks, so the temperatures get recorded as part of the shift rather than as an afterthought.
These targets sit inside a bigger compliance picture. If you are setting up, start with food business licences and permits and your allergen management, then pair this chart with a food shelf-life chart so temperature and time are both covered. Get those four right and food safety stops being a scramble before a visit and becomes just how the kitchen runs.
What temperature is the danger zone for food?
The danger zone is 5–60°C. Bacteria multiply fastest across this band, and per MPI guidance the whole game is minimising the time food spends in it. Keep cold food at 5°C or below and hot food above 60°C, and move cooked food through the zone quickly when you cool it. Anything left sitting between those two numbers is on a clock: track how long, then refrigerate, use, or discard based on the 2-hour and 4-hour rule.
What core temperature should chicken reach?
Cook poultry to 75°C at the core, measured in the thickest part with a probe. Per MPI guidance, validated equivalents also work: 70°C held for 3 minutes, or 65°C held for 15 minutes, because time at a lower temperature achieves the same lethality. Chicken is unforgiving, so probe the deepest point, not the surface, and never judge by colour or clear juices alone. Sanitise the probe between different foods so you are not carrying raw-chicken bacteria onto cooked product.
How quickly do I need to cool cooked food?
Get it from 60°C down to 5°C within 6 hours total, per MPI guidance, and push it through the top of the danger zone fast. Use shallow trays instead of deep pots, ice baths, or a blast chiller. Never put a hot pot straight into the fridge: it warms everything around it and stalls in the zone for hours. Break big batches into smaller portions, stir, and check with a probe rather than guessing that it feels about right.
What is the 2-hour 4-hour rule?
It is a decision rule for food sitting in the danger zone with no temperature control. Under 2 hours total, refrigerate it or reheat above 60°C for later. Between 2 and 4 hours, use it now and do not return it to storage. Over 4 hours cumulative, discard it, no exceptions. The clock counts total time in the zone across the whole day, so track it on a log rather than resetting your memory each service.
What temperature should my fridge and freezer be?
Set fridges to 5°C or below, aiming for a steady 2–4°C, and freezers to −18°C. Per MPI guidance, chilled deliveries should arrive at 5°C or colder and frozen product should be hard, not soft or partly thawed. Check with a probe at goods-in and reject anything out of spec. Fridge temperatures drift with door-opening, packed shelves, and failing seals, so log twice a day rather than trusting the built-in dial, which is often wrong.
How do I calibrate a probe thermometer?
Do the ice-water check. Fill a cup with crushed ice, add a little water, stir, and the probe should read 0°C. If it is off by more than a degree, recalibrate it or replace it. Do this regularly, and always sanitise the probe between different foods so you are not cross-contaminating. Check the thickest part of whatever you are measuring, hold it until the reading settles, and keep a spare, because a drifting probe quietly makes every other temperature record meaningless.
Storefront, orders, kitchen, CRM and marketing in one place. Start free in a couple of minutes, no card needed. Pop in your email and we'll take you straight to setup.
Quoting a catering job on gut feel is how you end up working a Saturday for nothing. Pricing catering, line by line, with two costed examples.
Label it or bin it: the argument only ends when everyone reads the same shelf life chart. Fridge and freezer times for prepped food, with day dots and FIFO.
Nobody enjoys counting the walk-in on a Sunday night. This stocktake procedure is quick enough to keep up, and turns food cost from a guess into a fact.
Storefront, POS, kitchen, CRM, marketing. One login, one bill. NZ$1/month for the first 3 months.
Start free trial